Kitchen
| First we ripped out the old island. | 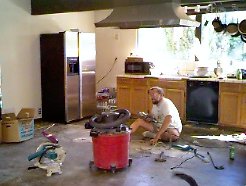 |
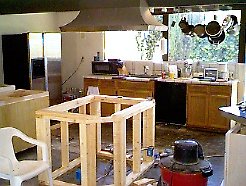 |
Then we built a new one. This pony wall will hide electrical services and hold up the countertop. |
The Window
| Then the window showed up. We had to rip out all the cabinets against the window first... |
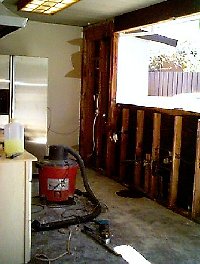 |
 |
...then we ripped out the old window, leaving a large hole. Fortunately, it never rains in California, so the weather was great for this adventure. |
| Next we resized the hole in the wall
(making it taller and narrower). MJ was a little concerned about the new sink location, but it was just temporary. Here it is, sitting in a bucket on the deck... |
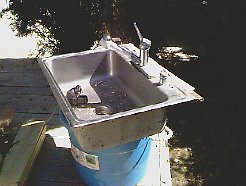 |
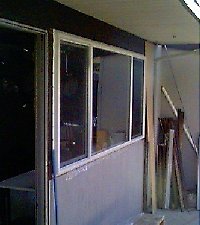 |
WE got the window in that afternoon and it looks lots better than the old one (and it has windows that open...what a concept!) |
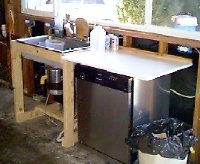
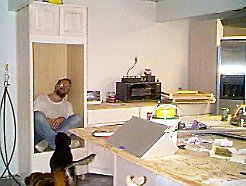
| The next day, we built a
new..uh..cabinet for the kitchen sink so we didn't have to go without one. George also decided that we needed a dishwasher in the interim, so he hooked it up, too! |
 |
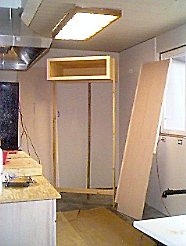
Wall Cabinets
 |
Next we insulated the outside wall and replaced all the sheetrock. We couldn't get a plasterer to show up, so george learned how to skip-coat and it looks fine... | 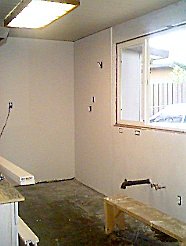 |
| Then we started installing the rest
of the cabinets. The corner refrigerator cabinet was key- it determined the positioning of the all the rest. We had to construct the corner cabinet; it consists of the two side pieces, all the front trim (which we built), and the top cabinet; and it had to be built in place. So, we got all the pieces ready, then built a tripod to hold up the top cabinet as we constructed around it. |
 |
 |
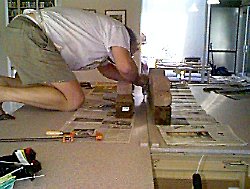
Once the corner was built and
square, we just started dropping the cabinets in; that part is pretty straightforward; you
put the box in place and use shims to square it all up, then screw it in to the studs. Here's George taking a break in the oven box. |
| The next day, we installed all the cabinets along the outside wall. Notice that most of the doors have been removed to facilitate screwing the faces of the cabinets together. If you take off the doors and hinges, you can screw the faces together under the door hinges, so the screws don't show when you're done. | 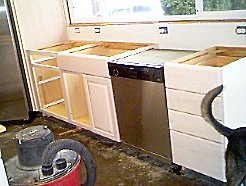 |
 |
Here it is with all the cabinets in
place. |
Fun with Corian
| After George managed to hustle enough Corian to
do the counter tops, the hold up was the glue! He finally scored some from his sister in
Rhode Island. (buying drugs is easier than getting this stuff-ed) Anyhow, it was finally the moment of truth; time to cut the Corian. This part was anti-climactic- it was actually easy to work with! After completing the counter by the microwave, we were ready to tackle the island! |
 |
First we rough cut the sheets to size and check the fit. |
| Then it was time to glue it together. Here's
George laying down a narrow bead of glue between two sheets. As soon as he's done, we'll
clamp the two sheets togehter using the the temporary blocks that we've hot-glued to the
surface. Note that the corian glue is tough to work with- it's a 2-part epoxy and it sets up in 3-4 minutes, so you have to really hustle! |
 |
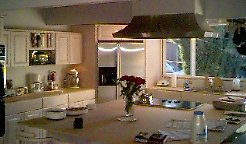
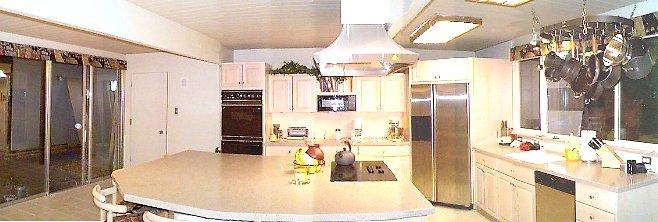
| Current panoramic view of kitchen. |
 |